Are you doing some kitchen renovations and want a concrete countertop? Or are you looking to cut or break up concrete for any other reason? Both of these tasks can be taken on by any DIYer with the proper tools, safety equipment, and knowledge.
In this article, we will specifically look at cutting concrete with a circular saw. Among other things, we will cover the type of blade you should use as well as the entire cutting process step-by-step.
Let’s start with the very basic question, though…
Can You Cut Concrete with a Circular Saw?
The answer to this question is definitely yes, but only for smaller projects. As a rule of thumb, you can use the tool for concrete less than 6 inches thick. This means a circular saw is exactly what you need to make that countertop you’ve always wanted to have or to cut a smaller slab.
If you are working with a larger slab, check my guide to the best ways to cut concrete.
What Type of Blade Should You Use?
It is important to make sure you have the right type of blade to prevent damage to your tool and injury. There are three types of blades commonly used for cutting concrete: the abrasive corundum masonry blade ideal for very shallow cutting, and dry and wet diamond blades for deeper cuts.
Abrasive Blades
Using an abrasive blade is ideal if you have a tight budget and only need a few shallow cuts. These blades are capable of cutting asphalt, stucco, and concrete in small cuts 1/2-inch to 1/4 -inch deep.
While these blades are very budget-friendly at about five dollars per blade, they wear down very quickly, so they are not ideal for long term use.
Dry-Cutting Diamond Blades
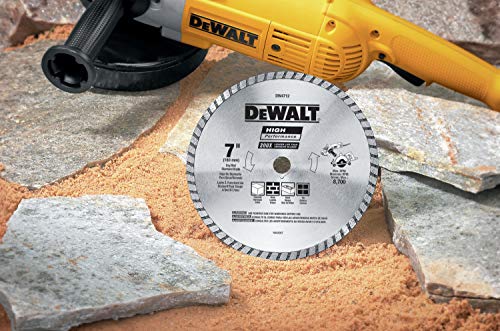
A dry-cutting diamond blade is a great choice for deeper cuts and long-term use. This blade features tooth and serrated rims, allowing for an easy cut.
The teeth and serration allow for the blade to keep itself cool during use, but it is still important to take a break every 30-45 seconds to clear any dust out of the saw. This is especially important as this blade creates very fine dust that can get into and damage the saw’s motor if not careful.
Wet-Cutting Diamond Blades
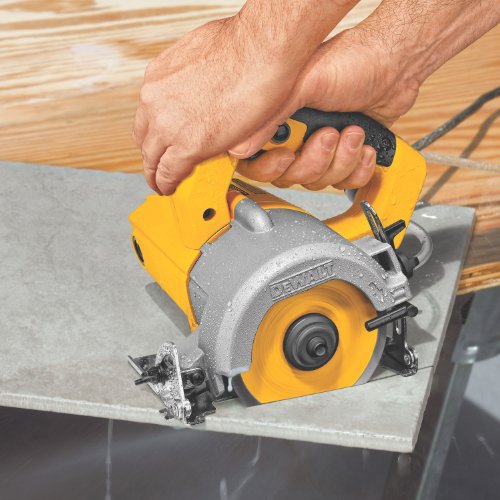
There is another type of diamond blade, one made for wet-cutting. The wet-cutting blade needs to have water running down the blade at all times. This is crucial for keeping the blade cool and keeping dust under control.
The wet-cutting blade allows for a quick, clean cut. It is able to cut all the way through the concrete with ease, so you don’t have to go back with a hammer and chisel to tap off excess pieces. This blade has to be used with a saw that can continuously distribute water onto the blade during the cutting.
How to Cut Concrete with a Circular Saw
Now that you know the basics, let’s talk about the actual cutting process, step by step.
Step 1: Choose and Install the Right Blade
Making sure you are using the right blade for the job is crucial. Are you planning to go with dry- or wet-cutting? Do you need short, shallow cuts or do you need long, thick cuts? After choosing the proper blade, install the blade on the saw.
To install the blade, first, check that your saw is turned off and unplugged. Press down on your saw’s arbor-lock to open and place the blade. The teeth of the blade should be facing in the direction that you will be cutting. If the blade is rotating right, face the teeth to the right. If rotating to the left, face the teeth to the left.
Use a blade wrench to tighten the arbor nut, but be careful not to over-tighten. If the nut is too tight, it will be hard to remove that blade to replace it with another. Once the blade is in place, close the arbor lock.
Step 2: Prepare Your Workspace
If you are working in your basement or garage, it is very important to make sure you cover things you do not want to be covered with dust. Tape drop cloths over doors, walls, and other items that can’t be removed from the area.
If you are working outside, close all of the windows in your house. Alert neighbors of what you are going to be doing and make sure they close their windows as well, just in case. Make sure to tape drop cloths over any air intake that you might be near outside. This will prevent dust from getting in through the vents.
Step 3: Mark the Concrete
Find the spot in the concrete where you want to cut. Mark the spot with a chalk line. Make sure the line is thick enough that when water is trickled over, it won’t just disappear. The water will help contain some of the dust, but be sure you don’t wash the line away.
Step 4: Put on Your Safety Gear
Safety is the most important step when using any kind of power tool. Safety precautions will protect you and everyone helping you. Wear heavy clothes such as pants and a jacket. This will protect your skin from any flying debris.
Also, wear shin guards and knee pads. There is always a risk of a chunk of concrete flying off and coming right at your knees and legs. Wearing pads will soften the blow and prevent any serious injury.
If you have steel-toed boots, this is the time to wear them. In case you don’t, put on your thickest pair of tennis shoes. If something drops on your foot and you are not wearing the proper protection, you can break your foot.
Debris and dust will be flying all around when you are cutting, so it is extra important to wear safety goggles and a filtration mask. These will protect your eyes and lungs in the event something would fly at your face.
Finally, power tools are loud. To keep your ears safe, you should always wear a pair of industrial earmuffs or plugs. You won’t bust an eardrum with this protection.
Step 5: Prepare a Guide Board
Any piece of scrap wood that is roughly 1-inch thick will be a perfect guide board.
Place on the board on the side of your chalk line.
While cutting, hold the guide board in place so it doesn’t shift. You might even want to secure it to the concrete with screws if possible. Shifting can cause issues with the straightness of your cut.
Step 6: Set Blade Depth and Start Cutting
With your saw still turned off and unplugged, use the depth lever or knob to adjust to your desired depth. It is recommended to stick around 1/2-inch to 1/4-inch increments. You can always cut more later if you need, but you can’t put back what has already been cut.
Now it’s time to plug your saw in. Turn it on to the lowest speed setting. As you start cutting, be very careful to maintain a steady grip. Always hold the saw with two hands and hold on to it firmly.
Move the saw slowly, don’t go too quick or you could cause damage. Cut for 30-45 seconds at a time, taking breaks to remove dust and cool the blade.
Step 7: Remove Dust and Rest Saw
Every time you take the saw out of the concrete for a break, spin it for a few seconds in the air to clear out any dust debris off the blade and out of the motor. After that, allow the saw to rest for the same amount of time that you cut.
If you cut the concrete for 30 seconds as recommended earlier, allow the saw to rest for at least 30 seconds.
Step 8: Remove the Guide Board
When your first cut is finished, it will serve as your cutting guide.
As such, you should remove the guide board to get it out of your way. Continue cutting the concrete, now using your first cut to guide where you will go next.
Step 9: Cut Deeper
If you need to adjust the blade depth for a deeper cut, first make sure your saw is turned off.
Increase the depth in 1/2 -inch increments until you reach your desired depth. You can then turn your saw back on and continue cutting.
Step 10: Finish with a Sledgehammer
A wet blade may be able to make a clean cut all the way through the concrete, but a dry blade will need some extra help.
While still wearing your protective gear, grab a sledgehammer. Start hammering near your cut, but not on it. As pieces of concrete break off, move them out of the way.
Step 11: Getting a Clean Edge
When your cut is completely finished, you will need to clean up the edge with a claw hammer and a mason chisel. Tap away small pieces of concrete that may have been left behind and are sticking out.
Then you’re finished!
Mistakes to Avoid, Tips & Tricks
Always check to make sure your blades are sharp before starting. If your blade is dull, they won’t cut through easily and can damage the concrete. Working with dull blades can also, ironically, lead to injury.
Talking about injuries, protective gear is always a must. Never start a job if you do not have the proper protection to keep you and those around you safe. Make sure you cover doors, intake vents, and other objects you want to keep dust-free.
Avoid using your saw at high speed. It is safer to cut slow and steady to make sure your cut is exactly how it should be. If you use the saw too fast, you could lose control of it and mess up your cut completely or end up injuring yourself.
Summary
Cutting concrete with a circular saw is absolutely possible with the right blade, equipment, and safety protection.
Follow the steps outliner in the article above and you will end up with a clean cut while remaining safe.


